My Freezer Is Not Turning On Or Has Stopped Functioning?

freezer repair Edmond

freezer repair edmond


My Freezer Is Not Turning On Or Has Stopped Functioning?

If your freezer is working but not freezing the contents properly, check if the following problems could be causing the problem. If the freezer has stopped working or is not freezing, the temperature control thermostat may be the problem. The temperature control thermostat sends voltage to various parts of the freezer and if it is not working properly, the freezer will not cool. If the freezer does not work or freezes, the problem may be in the control board.

If the freezer does not freeze food, the compressor start relay may be the problem. This means that if the start relay fails, the compressor will run intermittently or, most likely, will not run at all, i.e. the freezer will not freeze.

The compressor start relay, also known as the controller, is used to power the compressor start winding to start the freezer. The temperature control thermostat also has electrical contacts that provide power to the compressor circuit when the freezer needs to start cooling.

If you set your refrigerator’s thermostat to cooler air, your refrigerator’s compressor will activate, causing low pressure to flow through the cooling fans. If one of the fans fails or the compressor is turned off, the refrigerator will cool little or no cooling at all.

Using the freezer to cool hot food or frequently opening the freezer will affect the internal temperature. The freezer temperature may be too low if the frost is light, snowy and seems to be all over the place. If the environment is too cold, the freezer may not have enough time to maintain the temperature. Very low outside temperatures can prevent the freezer from working properly, especially if it is in a garage or outbuilding without heating.

If the temperature is too high, the ice may not freeze properly and appear smaller or deform. A Whirlpool refrigerator that does not produce ice may have incorrect temperature settings.

If the refrigerator is working, the problem could be the defrost timer, defrost heater, or defrost thermostat. When the coolant level gets low, the refrigerator may not work properly.

Frost only on the back of the refrigerator where the evaporator coil is located indicates a problem with the defrost cycle. If the back of the refrigerator where the evaporator coil is located is heavily frosted, you may have a defrost problem. If you remove the lid inside the refrigerator and find that the coils are completely full of frost, remove everything from the freezer and freezer, unplug them and let them thaw for 24-48 hours.

Lower the freezer temperature setting to see if the refrigerator starts. Another parameter to check is if the freezer is turned off. If the freezer does not turn on after power is restored, check the circuit breaker to see if it has tripped due to a power failure. There are several reasons why a chest freezer may stop working, such as the power management turning off automatically, the freezer outlet is lagging, or the freezer just needs time to turn back on.

If the freezer has stopped working and won’t freeze, it could be due to a problem with the start capacitor. If your freezer is heating up instead of cooling down, the motor fan may have stopped working, indicating that it is broken. When your freezer isn’t doing its job, it can’t be a disaster that needs a full repair or replacement.

Unfortunately, the freezer can break down when you need it most and when you can’t handle repairs. The freezer is a viable appliance that can be repaired if the above problems occur and will last a long time with proper maintenance. Whether you’re having a problem with your Beko refrigerator not working properly due to it not freezing, or your Hoover refrigerator having trouble reaching the correct temperature, there’s no reason why you can’t fix it. rather than replace the freezer yourself. If the appliance repair service cannot repair within one day, or if the refrigerator has a non-functioning freezer, measures must be taken to protect frozen food from defrosting.

If my freezer is within that range and you’ve generally taken good care of it, you’re probably dealing with something simple like airflow blockage, frost buildup, damaged seals, or dusty coils.

Since a typical refrigerator/freezer has a lifespan of 10 to 15 years before replacement, the age of the freezers should be considered first. It is likely that the freezer in the refrigerator/freezer combination will begin to defrost shortly after the appliance stops working.

This way, as soon as the appliance is working again, you can check the thermostat to see how hot the interior and its contents are. For the exact minimum ambient temperature your refrigerator and freezer will operate at, please refer to your user manual. Refrigerator and freezer controls vary by refrigerator brand and model, but experts recommend keeping the refrigerator at around 40 degrees Fahrenheit. Typically, refrigerators maintain a temperature of 36 to 40 degrees Fahrenheit in the refrigerator compartment and 0 to 5 degrees Fahrenheit in the freezer compartment.

It seems too easy to be a solution, but moving things to the freezer can often provide a quick fix. Compressor Pump: Refers mainly to non-freezer freezers, and if your freezer seems to have stopped working, the compressor pump may be faulty, which is located on the back of the unit and looks like a round black reservoir.

To schedule freezer repair services in Edmond Ok contact Edmond Appliance Repair by calling 405-531-0055 or you can visit our website at https://edmondappliancerepair.net. Call now!

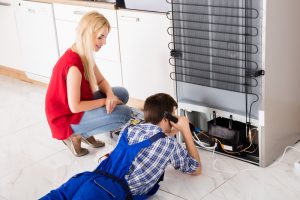
 

My Oven Won’t Turn On?

oven repair edmond oklahoma

Young Woman Looking At Male Worker Repairing Oven Appliance Using Multimeter In Kitchen Room


My Oven Won’t Turn On?

One of the first reasons your oven might not turn on is that something is wrong with the heating element. The cooking element is an important and simple part that is easy to replace in most electric ovens. The kitchen element is responsible for generating heat for the rest of the oven.

The heating element plugs into the back of the oven and is usually held in place with a pair of screws. You may have to remove the oven top to properly inspect the burner elements. To find out if there is a problem with the igniter, you should look at the igniter when you light the gas oven.

To test the igniter, turn off the gas oven switch, then make sure the power is off, making sure the oven lights, clock, and any other electrical functions are not working. If the hob igniters work fine but the oven does not ignite, the problem is most likely with the igniter and not the gas. If the fuse is already blown, the gas oven will not ignite because it will detect a lack of safety measures.

If the thermal fuse detects that the oven is overheating, it will trip and the oven will shut down. If the temperature control thermostat fails, the temperature control thermostat can prevent the gas oven from igniting. You don’t want gas to go into the oven when it’s not on because that creates a major safety issue.

So make sure the gas safety valve is working properly before restarting the oven. The oven safety valve (also known as the gas valve) is the part that ensures that the gas does not release until the igniter has reached the correct temperature required to ignite the gas. When the igniter passes a certain amount of current through the oven safety valve, the valve opens and allows gas to flow into the oven burner.

If everything is in order with the gas supply, turn on the gas igniter on the oven itself. If the igniter looks normal, you can turn the power back on, set the gas oven to preheat, and watch the igniter at the start of the heat cycle.

If there are no signs of damage, run the oven for a minute or two and check to see if any element is really heating up. If the oven’s power supply is not at fault, the next thing to check is a fault in the oven’s resistances.

An oven that does not heat is usually caused by a faulty igniter (gas oven) or heating element (electric oven). One of the most common causes of oven failure is a burnt element of the oven or grill, which is why the oven won’t heat up.

Before replacing your oven’s thermostat, you should first check components that typically fail, such as the igniter or cooking and grilling elements. If you’re trying to fix a problem with your electric oven, we recommend checking your oven’s control panel first, as this is an easily overlooked defect, which in turn can lead to wasted money on other parts of the oven. . . .

If you turn on your gas stove and it doesn’t heat, there could be a number of reasons why you can fix the problem yourself without calling for service. In this article, we’ll give you step-by-step instructions on how to find the cause of the problem and fix it so you can use your gas oven again. A few basic steps are enough to fix any problem by replacing the resistance inside your electric stove or oven.

If nothing has changed after repairing the new element, the reason that the oven does not work may be an electrical problem. If the oven fuse is blown, before replacing the fuse, inspect the oven element and its wiring to determine the cause.

A blown fuse indicates a problem elsewhere in the oven, such as a shorted wiring or a problem with the control board. Many toaster ovens have internal fuses that can blow for a variety of reasons, be it a wiring issue or a more serious problem with your home electrical system. If a sensor or thermostat fails, the oven may not turn on at all.

If you have a gas oven, one of the most common reasons it might not work is a faulty igniter. A dirty or defective igniter may be seen in the oven, or you may need to remove the oven floor to gain access to it. Replacing an oven igniter is easy if you understand the process. If your igniter is not sparking, you will need to replace the oven burner igniter.

If the gas elements or burners are damaged, clean them and then place them back in the gas oven and see if that fixes the problem. Large spills inside the oven will leave a layer of ash that may require manual cleaning.

If you have a multimeter, you can use it to test your oven (make sure it’s unplugged first), but in most cases you’ll need to call a professional to repair or replace the temperature sensor. Most modern ovens will use an electronic control board to control the oven safety valve on a gas stove or oven, and to cook and grill on a stovetop or electric oven.

To schedule oven repair in Edmond Ok contact Edmond Appliance Repair by calling 405-531-0055. Or you can visit our website at https://edmondappiancerepair.net or also our Google business page at https://cutt.ly/BATO1a2. Call now!


My Oven Door Won’t Shut?

oven repair Edmond


My Oven Door Won’t Shut?

Another possible problem due to which the oven door may refuse to close is the hinges. Failure to close the oven door is a frustrating problem because, unlike an electrical or internal failure, it may initially appear to be a problem that you can easily fix yourself.

After all, if you can’t close the oven door, you’ll have a hard time cooking anything. If you cannot close the oven door completely, there may be an object in the way, the hinges are misaligned or broken, the spring is worn, or the rubber seal is damaged. If you’ve done all of this and are still having a hard time closing the door, it’s also possible that you need to completely replace the hinges.

The switch is one of the most common mechanical reasons why you may have difficulty closing the oven door. If the door does not lift, try unscrewing the screws holding the hinges inside the oven. Pressing may mean that the hole inside the oven is out of place.

If you find that your oven light won’t go out, or you can physically see the inside of the oven tub itself from the door side, the oven door latch is the most likely culprit. The oven door seal can be placed inside the door or inside the oven tray itself. The rubber gasket ensures that the oven door seals tightly and keeps the heat inside, preventing it from escaping.

The heating element is usually located inside the oven and the igniter is accessible from below. An oven that does not heat is usually caused by a faulty igniter (gas oven) or heating element (electric oven). It is responsible for keeping the heat of the oven exactly where it should be.

To check for damaged or misplaced door springs, you may need to pull out the bottom drawer and look under the oven. Because door hinges are designed to extend the life of your oven, you can also find out why the hinges rust prematurely. If necessary, remove the oven door from its hinges to more effectively remove dirt or rust.

Just as you can stain the door seal and door seal, the same can happen to your oven hinges. A faulty oven door hinge can make it difficult to open and close the oven door; and hence it is wise to replace it if it fails. Loose or misaligned hinges can prevent the oven door from closing completely, and removing the screws can help fix them.

You will need to remove the oven door itself, which can be done by lowering it all the way, releasing the clips, then lifting it three-quarters to close, and pulling it up. Keep an eye on the hinge holes along with the oven and you’ll be fine.

If someone is replacing the hinge, make sure they replace the hinge bracket as the company recommends, or don’t lift the door…it’s easy to see that a lazy repairman doesn’t want to take the oven out to fix it properly. A more serious problem could be a broken or misaligned hinge, which you can fix yourself by manipulating the frame, but you may need to have a professional toaster oven repairer do this for you. It’s better to find a qualified oven repair service than to have an accident.

If both your gas oven and gas burners have stopped working, the problem is most likely related to the gas line and will require professional repair. While this may fix the problem for a while, it is likely to reoccur unless you ask a professional to replace the oven door or do a more thorough repair. If you’re still having problems with the cycle, you’ll probably need to call a repairman to replace the interlock motor and switch, control board, thermostat, or some other component that’s preventing the oven’s self-cleaning cycle from starting.

If you just need to replace the oven door, we’ll answer your questions too, so you don’t have to buy a new one. If you’re looking for a new oven door hinge to fix an oven door that won’t close, Appliance Repair OKC Services is confident you’ll find the perfect high-quality replacement at a great value. An oven door that doesn’t close properly may not seem like a big deal, but if the oven door won’t close, it also means you can no longer use one of the most important appliances in your kitchen.

It could be oven grates that are out of place, or food or dirt can build up on the walls that prevent the door from closing properly. If the door seal is covered with food debris or otherwise raised, it will not form a seal and the result will be that the oven door will open slightly if the obstruction is severe enough. Just like your washing machine or refrigerator, your oven also has a door seal made specifically to keep heat in and fresh air out during the cooking process.

To schedule oven repair in Edmond Ok contact Edmond Appliance Repair by calling 405-531-0055. Or you can visit our website at https://edmondappiancerepair.net or also our Google business page at https://cutt.ly/BATO1a2. Call now!


My Ice Maker Isn’t Getting Water?

ice maker repair service edmond oklahoma


My Ice Maker Isn’t Getting Water?

This often becomes a problem when you find that your Whirlpool ice maker is not working but the water dispenser is still working. If you are still having problems with water not reaching the ice maker and making ice, the problem may be in the water supply line. Water may not enter the built-in ice maker due to frozen lines, a missing filter, or a closed water supply valve. When a Samsung ice maker doesn’t add water, it’s usually due to frozen or clogged pipes, a missing filter, or the ice maker needs to be reset.

If the plumbing is clogged, water cannot come out and ice does not form. The waterline can also freeze, preventing water from passing through the waterline and filling the mold with ice. If a lot of ice freezes, new ice cannot form and the waterline can also be a problem because it cannot fill the sample. When this cloudy water remains on the ejector arm and builds up over time, it can cause the ice machine to jam, preventing new ice from falling.

If the water supply valve has sufficient pressure and power is supplied, but the ice maker does not fill with ice making water, replace the water supply valve. If the ice maker fill tube is frozen, higher room water pressure may be required to get water into the ice maker, or there may be dirt or a faulty water inlet valve. The fill pipe supplying water to the ice maker in the refrigerator may freeze and prevent water from entering the ice maker. Accumulated ice can cause the water inlet tube to freeze, so the problem may be a faulty valve if the inlet tube repeatedly freezes after defrosting.

If no ice or water is found, the water pressure is low and the fill tube is no doubt blocked by ice. Filling can have a variety of causes, such as blocked or blocked lines.

Either way, you need to get the refrigerator out of the wall so you can put it behind it and have easy access to the water lines. You can install a heat lamp so that the light (also known as heat) is directed towards power lines with an ice outlet. Icemakers receive water through a small plumbing pipe that runs from the refrigerator to a water pipe, funnel, or water filter.

The water supply tap itself will be located on the back wall of the refrigerator or under the kitchen sink. The location of the water inlet valve varies by manufacturer, but on Kenmore and Whirlpool icemakers, the water inlet valves are usually located behind the refrigerator. When the correct temperature is reached, the voltage charge signals the water inlet valve to open, allowing water to drain into the ice tray.

A clogged water filter, a kinked water hose, or a faulty inlet valve can restrict water flow to the icemaker. After all, anything that is filtered by tap water before it turns to ice will eventually clog the filter. If the water pressure is so low that the water flows in a trickle and the temperature of the freezer is zero, it has no chance of creating an ice tray.

In addition to not filling with water, you can also reset the ice filter if it doesn’t produce ice or has lower performance levels. Ignoring replacement can lead to problems with the water dispenser and ice maker.

If none of the above steps fix the problem, it’s time to contact a professional refrigerator repair technician. From making sure the ice maker is on to checking for water supply issues, here’s how to have ice on hand. Here are two simple things to check when your fridge is having problems with water and ice shortages, as well as water and ice shortages.

Some refrigerators are designed to turn off the ice or water when the water filter needs to be replaced. You should have a refrigerator with ice to store food from the refrigerator while it is defrosting. The first way to melt the ice is to turn off the refrigerator and defrost the freezer and refrigerator.

Restore power to the refrigerator and wait for the water supply to fill the mold. Note. In the event of freezing, the water dispenser will continue to operate.

You can defrost the line with a hair dryer or by leaving the refrigerator unplugged for up to two hours. Hot water will melt stuck ice chunks without adding chemicals to the ice maker tray, making it safe to immediately resume ice making in the ice maker group. You can try defrosting the ice maker using a small amount of hot water, but this may not solve the underlying problem.

If you’re still getting ice cubes, but they’re not as good as they used to be, your line may be in the early stages of freezing. Whether you use your ice maker daily or even weekly, you can easily rely on handy ice cubes and delicious cold water. This change ensures that you’ll never serve contaminated or poor-quality ice, and you’ll never drink unsafe or bad-tasting refrigerator water.

To schedule ice maker repair in Edmond Ok contact Edmond Appliance Repair by calling 405-531-0055. Or you can visit our website at https://edmondappiancerepair.net or also our Google business page at https://cutt.ly/BATO1a2. Call now!


My Freezer Has Stopped Running?

Freezer Repair Edmond Ok

Young Male Repairman Fixing Freezer In Kitchen


My Freezer Has Stopped Running?

If the freezer has stopped working and won’t freeze, it could be due to a problem with the start capacitor. If the freezer does not work or freezes, the problem may be in the control board. If the freezer does not freeze food, the compressor start relay may be the problem.

This means that if the starter relay fails, the compressor will run intermittently at best or most likely not at all, i.e. the freezer will not freeze. The compressor start relay, also known as the controller, is used to power the compressor start winding to start the freezer. To test the faulty starter relay, a technician will disconnect power to the refrigerator and remove the starter relay from the compressor.

If you can hear the compressor motor running and the freezer is still not cooling, the problem may be with the evaporator or condenser coil. If one of the fans fails or the compressor is off, the refrigerator will cool little or not at all. The purpose of the fan is to remove heat from the condenser coil, and when the fan fails, the refrigerator will not be able to cool sufficiently, so it will continue to run longer.

The refrigerator will run constantly if it tries to cool down but fails to do its job. When the freezer fan is running, it means that the defrost timer and the cooling control of the refrigerator are set to COOL.

Turn on the refrigerator and check that the condenser fan is running while the compressor is running. Typically, the refrigerator condenser fan and compressor, located near the back floor of most refrigerators, kick in when the thermostat needs extra cooling. With continuous operation, the refrigerator’s compressor starts to overheat and wear out much faster than it would during normal operation.

When the appliance performs a defrost cycle, it produces more water than the tray can hold. If water is leaking from the appliance, this may be due to an overflow of the condensate pan. A sealed system can leak, and there is not enough freon to cool the device to the desired temperature.

If the environment is too cold, the freezer may not have enough time to maintain the temperature. If frost is light, snow is falling and seems to be everywhere, the freezer temperature may be too low. Lowering the temperature in the freezer is not the best test because many refrigerators are cooled through freezer vents.

The temperature control thermostat sends voltage to various parts of the freezer and if it is not working properly, the freezer will not cool. A faulty thermostat will not supply power to the refrigeration system and the freezer will not cool. The internal defrost timer contacts can fail, causing the defrost timer to stop in defrost mode, meaning no compressor is needed to cool the air in the freezer.

Most likely, a faulty component in the automatic defrost system is causing the refrigerator to run non-stop. Refrigerator and freezer door seals are another possible reason why your refrigerator won’t stop working. Sometimes a large plate, bottle, or something that doesn’t fit properly in the fridge or freezer prevents the door from closing.

You may be able to defrost the freezer and fix the problem temporarily, but it will come back. The only way to fix a freezer that won’t stop working is to fix the problem at the source. Interrupting the cycle will interrupt the cooling of the freezer, but there are many factors that contribute to this problem. Namely the defrost timer, the defrost timer is what makes the freezer heater work without frost so when it’s not working properly you’ll probably start to see ice build up because your freezer won’t be able to activate the heater so it just work continuously.

If the fan motor is broken, replacing it can return the freezer to working order. The evaporator fan motor forces air onto the evaporator coils and circulates in the freezer, if it is not running, the freezer will not cool down. To test the evaporator fan motor, the freezer service technician will open the door of the unit and turn the door switch.

You can check if the evaporator fan motor is connected to the freezer by opening the freezer door and then manually activating the door switch. You’ll know it’s an evaporator fan if the noise gets louder when you open the freezer door. Another reason why the freezer works but does not freeze is a faulty evaporator fan. The control may seem elementary, but a freezer filled to capacity can cause airflow blockage, especially if the evaporator fan is blocked by a bucket of ice cream or a bag of vegetables.

It may seem strange, but your freezer does its job much more efficiently when it has to chill a lot of food. This way, you’ll get a better idea of ​​what’s going on when your freezer isn’t freezing food properly. If you notice a large amount of these characteristic ice crystals, or if it’s been more than a year since you last defrosted your freezer, a simple defrosting will most likely help, allowing the fans and coils to breathe again and keep working. . Whether you’re having a problem with your Samsung fridge not working properly due to it not freezing or your LG fridge having trouble getting to the right temperature, there’s no reason you can’t fix it. rather than replace the freezer yourself.

To schedule freezer repair services in Edmond Ok contact Edmond Appliance Repair by calling 405-531-0055 or you can visit our website at https://edmondappliancerepair.net or our Google business page at https://cutt.ly/PAwR7Ny. Call now!


My Washer Overfills With Water?

washing machine repair service Edmond Oklahoma

woman with broken washer


My Washer Overfills With Water?

To understand what causes a washing machine drain to overflow, it’s important to first understand how your washing machine removes water during the wash. Filling the washing machine with too many clothes can also cause water to overflow. Soft clothing can deform the fill checker and even break the blender, causing spillage.

If you put regular detergent in a front loading machine, it will create too much foam and force the water valve to fill the machine with more water to get rid of excess foam that could overflow the machine. If the water valve becomes clogged, water will continue to flow into the tank and may overflow from the machine.

When the tub is full, the other contact powers the motor and starts the wash cycle. If the washing machine is full of water, run a spin cycle to empty the tank before repairing the washing machine. You should also disconnect the washing machine from the power source and shut off the hot and cold water supply lines.

Close the shut-off valves on the water supply lines by turning them clockwise. With a mains pressure of approximately 20 psi, these valves will remain closed even if the power to the washing machine is turned off. To replace the valve, you will need to turn off both its power and the water supply unit. Before blowing up, be sure to de-energize the machine.

If you are unable to check and adjust the water pressure, you will need to call a plumber. You should check your washing machine manual for the correct water pressure.

If you are sure that the cause of the washing machine overflowing is the lack of water pressure in the washing machine, this can be an easy solution. Water overflow can be a serious and costly problem, especially if the source is a washing machine drain.

Washing machine drains often overflow because the drain hose is clogged or the hose itself is too small in diameter to handle the amount of water being pushed through it. The most common cause of an overflow is a blockage in the drain or riser. Overflow or standing water can be dangerous when electricity is present. Water is everywhere, and unplugging the power cord from the wall can cause electric shock.

The best way is to turn off power to the circuit breaker or fuse box until you have cleared the area of ​​standing water and figure out if it is safe to have electricity near the problem area. After the waiting period, pour hot water through the drain behind the wall to release it. The drain behind the wall is where the drainage water enters, and when the drain is clogged, the water returns. Wastewater will flow directly into the sewer, minimizing mess.

If you have not cleaned the hose that connects to the drain line for a long time, you will find that a clump of fluff is the cause of the blockage. Lint and other debris are separated from the clothes during the wash cycle and drain out of the appliance along with dirty water, which can lead to a blockage in the drain hose.

If the clog is caused by a buildup of soap and lint, very hot water can drain the drain very well. The amount of water that is used for a wash cycle is not small, and the fear that all this water could end up on the floor is quite real. When the washing machine detects that there is too much water in the washing machine tub, or detects that water is leaking where it shouldn’t be, the overflow or flood protection is activated. The washing machine may mistakenly think that it needs to fill the tank with water until it overflows.

If the washing machine continues to fill with water even after the plug is disconnected, the water inlet valve may be defective. The water inlet valve is the part of the washing machine that opens and closes the flow of water into the drum, so if the water inlet valve is not working, you will probably need to replace it. If there is a hole in the hose, the pressure is reduced and the water level sensor of washing machines does not turn off the water supply to the water supply valve.

If it is not working properly, the water inlet valve will continue to supply water to the machine, causing it to overflow. If the machine starts to overflow, turn it off immediately to stop the flow of water. Consult the machine manual for instructions on what to do if a cycle stops prematurely.

The amount of time it takes to fill and overflow the riser helps diagnose where the obstruction is. If the riser is installed incorrectly, overflow or backflow can result. Typically, machines require a 36″ riser or higher.

Old houses have small pipes and do not have the ability to drain large capacity water. The reason your washing machine won’t stop filling with water could be that the hose is clogged, dropped, or punctured.

Depending on how much water there is, you may need to find a bucket. If there isn’t much water on the floor, grab a mop and bucket so you have a clean, dry surface to work on.

Regardless of what’s causing the overflow, it’s important to fix the problem immediately to avoid permanent damage to your home. While we identify the most common reasons why you might experience washing machine overflow below, there may be other issues that are causing your issue.

To schedule washer repair in Edmond Ok contact Edmond Appliance Repair by calling 405-531-0055. Or you can visit our website at https://edmondappiancerepair.net or also our Google business page at https://cutt.ly/BATO1a2. Call now!


My Oven Door Won’t Shut?

oven repair Edmond


My Oven Door Won’t Shut?

Another possible problem due to which the oven door may refuse to close is the hinges. Failure to close the oven door is a frustrating problem because, unlike an electrical or internal failure, it may initially appear to be a problem that you can easily fix yourself.

After all, if you can’t close the oven door, you’ll have a hard time cooking anything. If you cannot close the oven door completely, there may be an object in the way, the hinges are misaligned or broken, the spring is worn, or the rubber seal is damaged. If you’ve done all of this and are still having a hard time closing the door, it’s also possible that you need to completely replace the hinges.

The switch is one of the most common mechanical reasons why you may have difficulty closing the oven door. If the door does not lift, try unscrewing the screws holding the hinges inside the oven. Pressing may mean that the hole inside the oven is out of place.

If you find that your oven light won’t go out, or you can physically see the inside of the oven tub itself from the door side, the oven door latch is the most likely culprit. The oven door seal can be placed inside the door or inside the oven tray itself. The rubber gasket ensures that the oven door seals tightly and keeps the heat inside, preventing it from escaping.

The heating element is usually located inside the oven and the igniter is accessible from below. An oven that does not heat is usually caused by a faulty igniter (gas oven) or heating element (electric oven). It is responsible for keeping the heat of the oven exactly where it should be.

To check for damaged or misplaced door springs, you may need to pull out the bottom drawer and look under the oven. Because door hinges are designed to extend the life of your oven, you can also find out why the hinges rust prematurely. If necessary, remove the oven door from its hinges to more effectively remove dirt or rust.

Just as you can stain the door seal and door seal, the same can happen to your oven hinges. A faulty oven door hinge can make it difficult to open and close the oven door; and hence it is wise to replace it if it fails. Loose or misaligned hinges can prevent the oven door from closing completely, and removing the screws can help fix them.

You will need to remove the oven door itself, which can be done by lowering it all the way, releasing the clips, then lifting it three-quarters to close, and pulling it up. Keep an eye on the hinge holes along with the oven and you’ll be fine.

If someone is replacing the hinge, make sure they replace the hinge bracket as the company recommends, or don’t lift the door…it’s easy to see that a lazy repairman doesn’t want to take the oven out to fix it properly. A more serious problem could be a broken or misaligned hinge, which you can fix yourself by manipulating the frame, but you may need to have a professional toaster oven repairer do this for you. It’s better to find a qualified oven repair service than to have an accident.

If both your gas oven and gas burners have stopped working, the problem is most likely related to the gas line and will require professional repair. While this may fix the problem for a while, it is likely to reoccur unless you ask a professional to replace the oven door or do a more thorough repair. If you’re still having problems with the cycle, you’ll probably need to call a repairman to replace the interlock motor and switch, control board, thermostat, or some other component that’s preventing the oven’s self-cleaning cycle from starting.

If you just need to replace the oven door, we’ll answer your questions too, so you don’t have to buy a new one. If you’re looking for a new oven door hinge to fix an oven door that won’t close, Appliance Repair OKC Services is confident you’ll find the perfect high-quality replacement at a great value. An oven door that doesn’t close properly may not seem like a big deal, but if the oven door won’t close, it also means you can no longer use one of the most important appliances in your kitchen.

It could be oven grates that are out of place, or food or dirt can build up on the walls that prevent the door from closing properly. If the door seal is covered with food debris or otherwise raised, it will not form a seal and the result will be that the oven door will open slightly if the obstruction is severe enough. Just like your washing machine or refrigerator, your oven also has a door seal made specifically to keep heat in and fresh air out during the cooking process.

To schedule oven repair in Edmond Ok contact Edmond Appliance Repair by calling 405-531-0055. Or you can visit our website at https://edmondappiancerepair.net or also our Google business page at https://cutt.ly/BATO1a2. Call now!


My Ice Maker Doesn’t Seem To Be Getting Water?

ice maker repair service edmond oklahoma


My Ice Maker Doesn’t Seem To Be Getting Water?

Often this can be a problem when you find that your Whirlpool ice maker is not working but the water dispenser is still working. If you are still having problems with water not entering the ice maker and making ice, the problem is likely with the water supply lines. Plumbing can sometimes be the reason why a refrigerator’s ice maker does not create an ice problem. If your plumbing is not providing enough ice and is causing freezing, you will need a plumber.

Either way, you need to get the refrigerator out of the wall so you can put it behind it and have easy access to the water lines. Icemakers receive water through a small plumbing pipe that runs from the refrigerator to a water pipe, funnel, or water filter. If you find ice inside the mold, it means your ice maker is getting water and the problem is probably not the water supply.

The waterline can also freeze, preventing water from passing through the waterline and filling the mold with ice. If a lot of ice freezes, new ice cannot form and the waterline can also be a problem because it cannot fill the sample. When this cloudy water remains on the ejector arm and builds up over time, it can cause the ice machine to jam, preventing new ice from falling.

If the water supply valve has sufficient pressure and power is supplied, but the ice maker does not fill with ice making water, replace the water supply valve. If the ice maker’s fill tube is frozen, the house water pressure may need to be higher to get water into the ice maker, or there may be dirt or a faulty water inlet valve. If you suspect a problem with the ice machine, such as a dirty water filter or a faulty water inlet valve, you should call an ice machine specialist. If none of the above steps fix the problem, it’s time to contact a professional refrigerator repair technician.

If the ice maker in your refrigerator is not getting water, there are a few things you can check to try and fix the problem. From making sure the ice maker is on to checking for water supply issues, here’s how to have ice on hand. If these items are verified, call Customer Service and Appliance Repair OKC Services will troubleshoot and troubleshoot your refrigerator and ice maker.

You should have a refrigerator with ice to store food from the refrigerator while it is defrosting. If you’re not in a hurry, try unplugging the fridge for two hours and letting the ice thaw naturally. You can defrost the line with a hair dryer or by leaving the refrigerator unplugged for up to two hours.

This change may prevent your ice maker from getting enough water to make ice and actually release ice cubes. In addition to not adding water, you can reset the ice filter if it does not produce ice or if the performance level is low. If your ice maker uses water flowing through the water filter and you use a lot of ice cubes, you will need to replace the water filter more frequently.

Not all refrigerators will run water through the water filter on their way to the ice maker, but if yours can, this could be the cause. After all, anything that is filtered by tap water before it turns to ice will eventually clog the filter. If the water filling system is frozen or not working for any other reason, you may notice no ice or very small ice cubes when you inspect the ice maker.

When an ice maker stops working, the water inlet valve is one of the most likely culprits, especially if you find that there are no potential ice cubes in the ice maker. If the water hose is kinked or kinked, it may restrict water flow to the inlet valve. A clogged water filter, kinked water line, or a malfunctioning water inlet valve can restrict water flow to the ice maker.

When the Samsung ice maker does not fill with water, it is usually due to a frozen or clogged plumbing, a missing filter, or the need to reset the ice maker. If the ice maker is not producing ice, but you see the ice ejector lever move and a buzzing sound is heard for about 10 seconds, the water valve is calling for water that is not coming out. A faulty faucet valve—the small device that connects the icemaker’s water supply hose to the water hose from the icemaker’s water supply hose to the water hose—may cause a problem where the icemaker’s water supply hose connects to the water hose.

It goes without saying that ice makers need water to make ice, but to the untrained eye it can be hard to tell if an ice maker is getting enough water. If you use an ice maker every day or even every week, it’s easy to count on comfortable ice and deliciously cold water. Having ice ready when you want or need it is a luxury we all take for granted, that is, until you get some ice out of the freezer and it’s not there. Having ice when we need it is something we can count on.

Hot water will melt stuck ice chunks without adding chemicals to the ice maker tray, making it safe to immediately resume ice making in the ice maker group. Manually remove any remaining ice from the mold by adding a little water and letting it rest for one minute.

To schedule ice maker repair in Edmond Ok contact Edmond Appliance Repair by calling 405-531-0055. Or you can visit our website at https://edmondappiancerepair.net or also our Google business page at https://cutt.ly/BATO1a2. Call now!


There Is A Sheet Of Ice On The Bottom Of The Freezer?

Freezer Repair Edmond Ok

Young Male Repairman Fixing Freezer In Kitchen


There Is A Sheet Of Ice On The Bottom Of The Freezer?

If you see an ice cap on the bottom of the freezer, the drain is clogged. Unfortunately, there will most likely come a time when you find that ice has accumulated at the bottom of the freezer. Sometimes ice build-up can also (or exclusively) hide behind the back wall of the freezer.

Blockages are usually caused by solid ice in the drain behind the rear wall or ice build-up behind the rear wall. Icing on the bottom of the freezer can be caused by blocked passages that guide water to the evaporator tray. One such problem that can occur is a water leak, which can cause ice to form on the bottom of the freezer.

A layer of ice in the freezer occurs due to a clogged drain hole. If you see ice or frost building up in your freezer, you may have a problem with your refrigerator drain line or defrost system. The formation of ice in the freezer is due to a problem with the drain line, and the formation of frost is due to a malfunction of the defrosting system.

Let’s start with the formation of ice at the bottom and then continue with the accumulation of frost in the freezer. For example, you can scrape off excess ice to remove frost build-up. It is also another effective way to remove excess ice buildup.

You can then use a dry cloth to soak up the ice. In addition to turning off the freezer, you can use a liquid/dry vacuum cleaner or bowls of hot water to pre-soften the ice. Chest freezers can be defrosted using the same methods used to clear drain clogs in freezer-free refrigerators.

It is extremely useful for chest freezers to have a drain plug installed at the bottom to drain the water from the inside. If your freezer is leaking water inside the cabinet, you will need to find the location of the drains. You will need to access the clogged defrost drain (you will still need to replace the sensor) and make sure nothing but ice is blocking it. You can dismantle all freezer components and remove the panel to manually defrost a clogged drain pipe, or simply unplug the refrigerator and leave the doors open for 24 hours to allow the drain pipe to thaw.

I need to remove the ice from under the back panel To make sure that the ice is completely gone and the drain hole is clean, I unplugged the freezer and then removed the plastic cover on the back of the freezer inside. After cleaning and removing this drawer, I noticed a 1/4-inch layer of ice on the bottom of the refrigerator. I used a heat gun with a few towels at the bottom of the fridge to melt the ice.

Once inside, I saw ice running down the pipe, as well as the pipe itself filled with ice. Again with a heat gun held on another melted ice. The tube is about 1/2 inch and drops into a plastic tray at the bottom of the freezer. I pulled the hose out of the bottom of the fridge and cleaned the back of the lint and dirt. In my case, water leaked out of the refrigerator compartment and froze at the bottom. Once the back cover is removed, you will see that the drain pipe is most likely filled with ice, causing water to seep into the freezer.

Once the ice has melted, look and listen to the drain to see if water is coming out. The thick layer of ice melts and the water flows down a special drain pipe outside the refrigerator compartment into a special drip tray at the back of the refrigerator. The ice melts and the escaping water drains to a drain valve located under the cooling coils. If the drain line becomes clogged, the draining water will linger on the bottom of the freezer and form a layer of ice.

If the drain is clogged and the water has nowhere to go, it will freeze, forming a layer of ice on the bottom of the refrigerator. If too much waste water accumulates in the refrigerator, it can freeze again and completely block the drain holes. With any luck, the freezer drain is positioned to allow melted ice to flow out of the drain naturally. One of the most likely causes of water getting into the freezer is a clogged bushing in the drain line designed to remove condensate from the cooling coil.

If you haven’t defrosted your freezer and a layer of ice has formed on it, it may be thin enough to chip off. Accumulation of excess ice can spoil food and cause problems with the freezer. Icing that looks more like solid snow than pure ice can be caused by hot, humid air entering the appliance, as described in this article Fridge or Freezer Icing. As with manual defrost freezers, ice protection will take more time and effort.

If the problem persists after defrosting, consider this a sign of a freezer malfunction. Removing ice from the base of the freezer Defrosting the freezer is the easiest way to get through the search. In the old days, people had to defrost the refrigerator regularly to remove the thick layer of ice. Modern refrigerators have a frost protection function in which a defrost timer periodically melts the frost and ice on the cooling coils.

Since the temperature inside a sealed freezer is usually zero degrees, and if there is a leak of water that accumulates at the bottom of the freezer, you will soon have a thick layer of ice.

To schedule freezer repair in Edmond Ok contact Edmond Appliance Repair by calling 405-531-0055. Or you can visit our website at https://edmondappiancerepair.net or also our Google business page at https://cutt.ly/BATO1a2. Call now!


My Dishwasher Isn’t Draining Water Out?

dishwasher service edmond oklahoma

Smiling Woman Behind Technician Repairing Dishwasher In Kitchen


My Dishwasher Isn’t Draining Water Out?

The first thing to check to see if the dishwasher is draining water is the ‘drain hose’ from the dishwasher to disposal. Before accessing the drain pump, be sure to turn off the power and shut off the water supply to the GE dishwasher. To ensure that all water is removed from the bottom components of the dishwasher, the dishwasher uses a pump to self-drain at the end of the cycle.

To check for blockages in the drain or pump, remove the filter to expose the drain and pump at the bottom of the dishwasher. Water at the bottom of the dishwasher is the result of a clogged filter, waste disposal system, drain hose, drain pump, or air gap. When you start the dishwasher, dirty water and debris are drained through the drain hose.

To clean the drain hose, you need to remove the drain hose from the dishwasher and the sink drain. To check for a blockage, you will need to remove the bottom front panel and locate where the finned tube connects to the dishwasher’s drain pump. If no obstruction is found near the pump end, disconnect the hose where it joins the waste port or close the air cap to check for obstruction at that end.

You can access the dishwasher’s drain hose by looking under the sink – look for the plastic hose that connects the appliance drain pump to the appliance drain pump. Under the kitchen sink, in the cabinets, the dishwasher drain hose will go into the top of the air gap so that the bottom of the air gap goes into the drain below the basket or into the trash chute (if there is one). If there is still water in the dishwasher, the next thing you can try is cleaning the sink. Clean the block by removing the air gap plug and cleaning the inside of the air gap with a mixture of baking soda and water.

If your dishwasher doesn’t have a removable basket, clean the filter and pay attention to the area around the drain. If the removable filter can be removed, wash it in warm soapy water; be sure to remove all debris. This filter is present in your dishwasher to capture and filter out any food scraps.

The two layers of filters can become dirty and greasy, making it difficult for water to pass through and causing back up. When food or sediment builds up inside blockages in the filter, the dishwasher will not drain properly. If any of them are clogged with debris, they can block the drain, causing water to flow back into the dishwasher during the wash cycle.

A clogged drain hose can also cause a blockage that prevents water from draining and rises back into the dishwasher water. Complete waste disposal or an air gap in the connecting hose may prevent the dishwasher from draining properly. One of the problems that Beyer Plumbing most often encounters in Beyer Plumbing when it comes to slow drain dishwashers is a clogged drain filter.

The dishwasher filter traps large food particles so they don’t clog the drain pump or hose. The dishwasher filter and drain basket work together to trap food debris during the wash cycle, preventing soiled water from recirculating onto the dishes during washing. A malfunctioning drain pump may prevent the completion of the wash cycle, leaving water in the dishwasher.

Please note that it is normal for some dishwashers to have a small amount of water at the bottom of the tub after a full cycle. If the dishwasher accidentally turns off during a cycle, there will be water on the bottom when you open it.

After each of these steps, try running the dishwasher to see if the issues are resolved. If the problem is solved, check out these ways to shorten the life of your dishwasher.

If the impellers break or the pump motor fails, the dishwasher does not drain the water and remains in the tank. The drain pump uses impellers to push dirty water out of the dishwasher and into the drain hose. A curved drain hose, a lightweight, ribbed plastic hose connecting the dishwasher’s drain pump to the waste bin (or air plug), can prevent water from escaping.

With hot water and vigorous stirring in the dishwasher, strong foam can form, leaving you with a big mess to clean up. When the water level is too low to draw on, use towels to blot the last piece at the bottom of the dishwasher. If you find more than two or three cups of standing water, use a small container to remove as much of it as possible. Leave it in the area of ​​the drain filter for 15 minutes, rinse with hot water and run a quick cycle to see if the blockage is cleared.

To check the drain valve, press down on the valve bracket to make sure it moves freely. To repair a clogged drain pump, Diamond remove the bottom front panel of the unit to access the drain hose, disconnect it and remove the unit by hand or slide it. Depending on your dishwasher model, you can access the drain pump by removing the front lower threshold or by placing the GE dishwasher at the back and unscrewing the access panel underneath the dishwasher. Make sure nothing is blocking the bowl at the back of the dishwasher or the bottom of the tub.

To schedule dishwasher repairs in Edmond Ok contact Edmond Appliance Repair by calling 405-531-0055. You can also visit our website at https://edmondappliancerepair.net or you can visit our Google business page at https://cutt.ly/PAwR7Ny. Call now!